|
HOW TO SOLDER |
This article
covers all those points missing from all the other HOW TO SOLDER
articles.
1. GET A SOLDERING IRON
Get the cheapest and best soldering iron from eBay.
It costs $12.00 and is temperature-controlled.
It is just like a SOLDERING IRON STATION without the high cost. It does
EXACTLY the same job and there is absolutely no difference in the
quality of the soldering.
You can get 110v and 240v versions. The wattage can be 40 watt or
60 watt. For delicate electronic work it does not matter. The actual
wattage (heat released by the iron) will be less than 15 watts because
it will be turning on and off.
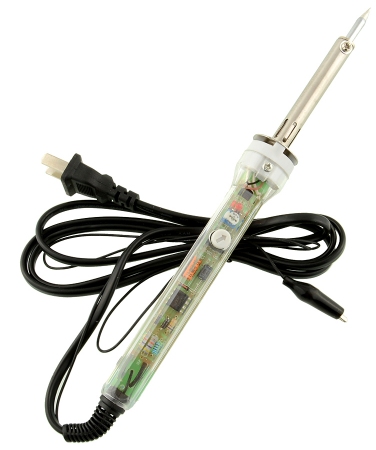
Temperature-controlled Soldering Iron.
It has a poor heat-scale (do not buy)
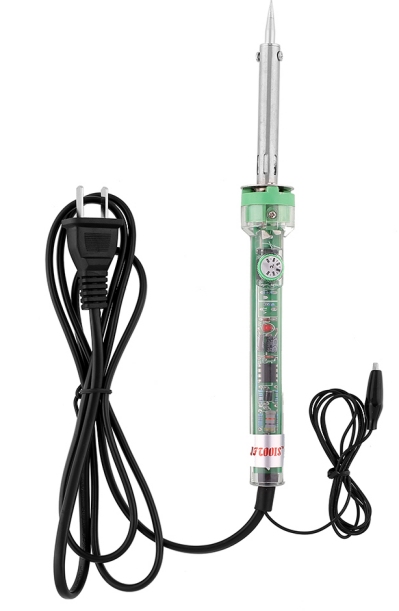
This iron has a much-better temperature scale (dial)
Don't use the following type of soldering iron. It gets too hot. (The rosin burns off too quickly and it leaves a carbon deposit that prevents the solder sticking to the connection.) The tip gets too hot and and it does not stay "clean."
CHINESE SOLDER
Don't use this type of
soldering iron. It gets too hot!
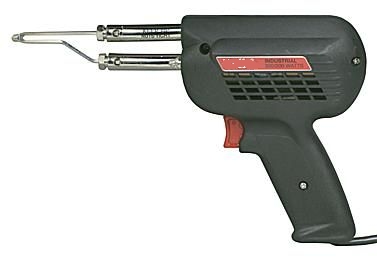
A Soldering Gun is USELESS for electronic work
It gets too hot and is far too heavy to work-with
2. GET A SOLDERING IRON STAND
Look on eBay for a soldering iron stand. A heavy stand is better than a
light stand. The heavier the better.
This is the type of stand to get. You can put the copper wire sponge in
the tray.
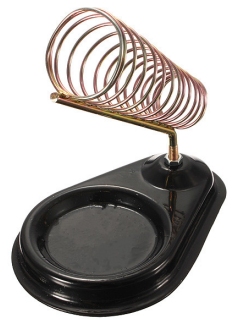
$3.00 to $5.00 posted (from eBay)
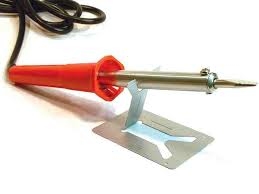
This soldering iron stand
comes free with the iron.
But the iron is a "hot" type and NOT recommended
Don't buy any soldering kit as they only supply cheap HOT SOLDERING
IRONS and these are quite unsuitable for electronic work.
3. GET A SOLDERING IRON TIP-CLEANER
You need a copper Wire Ball Sponge to clean the tip as shown below: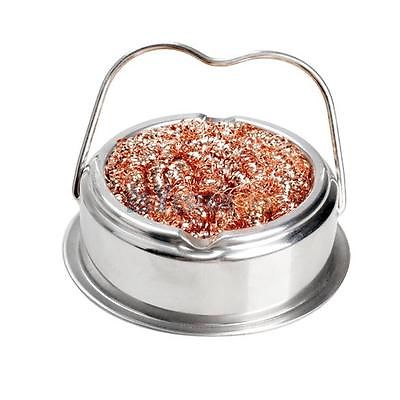
See eBay $3.50 posted. Can also be used as a soldering iron
stand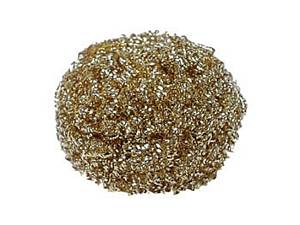
You can also get the "Golden Curls" separately for about $3.00
One bunch will last a lifetime.
It never wears out. Just shake to solder out of the coils.
When you use fine solder, you have almost
NO WASTAGE!!!!!
4. GET A ROLL OF SOLDER
Make sure the solder is 60/40 or 63/37.
It MUST be marked 60/40 or 63/37.
Ordinary tin/lead solder WILL NOT WORK. It melts at a high temperature
and you will damage delicate electronic components.
The solder MUST have flux in the centre of the "wire."
Do NOT buy ACID FLUX solder. It will eat the wires after a few months if
you don't wash it off.
Do not use 1mm solder. It is too thick.
Use 0.8mm solder or 0.6mm or 0.5mm solder. 0.6mm solder or 0.5mm makes the best
connections. You will be amazed at how it improves your soldering.
1mm solder is a WASTE OF TIME. It is too thick. It
leaves rosin on the joints, It leaves excess solder on the iron and is
much harder to use than fine solder.
Fine solder will improve your soldering 200% just by being fine.
This is something no other soldering manual has mentioned. May be the
authors have never soldered in their life !!!
60/40 or 63/37 Solder
About $1.00 posted for 1.6 metres
This photo is 0.8mm but try to get 0.6mm or 0.5mm
Chinese solder
It does not melt.
It does not run around the joint,
It does not harden with a shiny surface and it does not stick the components together - they fall apart !!!
I cannot use it and I have bought 10 different types of Chinese solder and had to throw them out.
You have to increase the temperature of the iron to get the solder to flow properly and it is only good for unimportant connections such as terminal blocks.
I used up 8 rolls by twisting the Chinese solder with good 0.71mm solder and the good solder flowed across the joint with the junk solder and made a good connection.
I will NEVER buy Chinese solder again.
Good 0.7mm solder is made by:
www.cagroup.com.au
and SAVBIT by Multicore Solders (Aust) Pty Ltd
5. GET A ROLL OF
DE-SOLDER WICK
De-solder wick (de-solder braid) is used to "sop up" (remove) solder
blobs and shorts and can help remove the solder from the leads of a
transistor or IC so the component can be removed from the PC board.
The wick contains resin (rosin - the same thing) and the solder flows
into the braid and this is how it is removed from the land (component).
This process always heats up the component and it may be damaged in the
process.
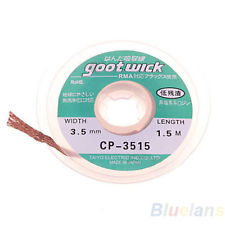
$1.20 posted
Don't pay $3.00 to $5.00 !!!
5. GET SIDE-CUTTERS
Make sure the side-cutters have a spring to keep them
open.
You can get side-cutters like either of these:

About $4.00
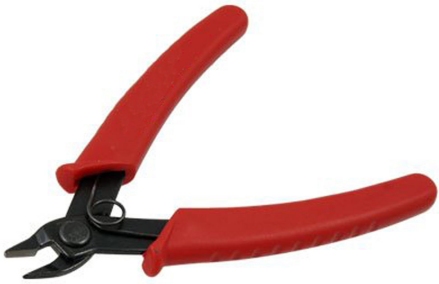
About $3.50
THE FIRST THING TO DO IS SET THE TEMPERATURE OF THE
SOLDERING IRON
There are two ways to solder.
Use a very hot iron and solder very quickly - for EXPERTS
or
Use a lower temperature - THE NORMAL WAY TO SOLDER
But, what is the correct temperature?
Here are two ways to set the soldering temperature:
Set the lowest temperature:
All temperature-controlled soldering irons on eBay (for $12.00) have a
temperature-dial, but the simplest way to set the correct temperature is
this:
Turn the dial to the lowest temperature and switch the iron ON.
Touch the solder to the tip - nothing happens.
Now turn the temperature up one division and wait a minute.
Try the solder again. Keep doing this until the solder melts very
slowly.
Now increase the temperature 20°C to 30°C (about one division) and you
have the perfect temperature for delicate soldering. It will melt the
solder quickly but not burn-up the rosin too quickly.
You will find the temperature on the dial will be very close to 370°C
(700°F).
Set the next higher temperature:
This HIGHER temperature allows you to remove the enamel from wires and solder
very quickly.
Increase the temperature slightly by turning the dial above the
temperature you used for the example above.
Add a small amount of solder to the tip of the iron and place the tip on
an enamel-coated piece of wire with
the tip of the iron to make good contact. Wait 10 seconds for the
enamel to melt. If the enamel does not melt, increase the temperature a
small amount and repeat the process.
When the enamel melts, you have the correct setting for fast soldering
and being able to remove enamel from wires.
The temperate on the dial will be very close to 400°C (750°F).
Some servicemen increase the temperature further to do VERY QUICK
SOLDERING, but this is ONLY for EXPERTS.
HERE'S AN AMAZING FACT
Soldering with a high temperature allows you to make a connection very
quickly and the component DOES NOT heat up any more than soldering with
a lower temperature - because you do it VERY quickly.
But a soldering iron without temperature control is TOO HOT and it can
easily damage the components, especially LEDs, transistors and IC's.
Temperature-controlled soldering irons are SO CHEAP. For $12.00 you get
an item to take the place of a $240.00 Soldering Iron Station and it is
just as good.
FACT NUMBER 2
Soldering is entirely to do with CLEANNESS.
Solder will not stick to a dirty wire. It will just "sit there" and the
wire can be pulled out.
Solder does not clean a wire.
It is the resin or rosin in the middle of the solder-wire that cleans
the connection.
But the resin does not work unless it is heated and melted.
When you are soldering, you don't want the solder. YOU WANT THE RESIN.
But the life of the resin is only 1 to 3 seconds before it has
evaporated.
This means you CANNOT transport resin on your iron.
By the time the iron has reached the connection, the resin has
evaporated.
The resin only works when it is heated AT THE PLACE where the connection
is to be made.
That's why the iron must be as clean as possible by pushing it through
the copper-wire ball shown above.
The ball will remove the old solder and clean the tip. Wiping the tip on a
wet sponge DOES NOT CLEAN THE TIP. It just leaves a fine film of
contamination on the tip that is a result of touching the plastic
sponge.
Place the iron on the joint to be soldered and immediately bring 0.8mm
or 0.6mm solder to touch the iron from the opposite side of the
connection.
At this instant you only want the rosin to do its job. Let the rosin melt
and clean the components.
NOW YOU WANT THE SOLDER . . .
Add a little more solder and allow it to run all over the connection and make a smooth and
shiny result.
Remove the iron and don't move the connection for 3 seconds.
Cut or trim the wire with side-cutters at the point where the wire
emerges from the solder. DO NOT cut through the solder and DO NOT cut
the wire before soldering.
Using 0.5mm solder will prevent excess solder remaining on the joint or
on the iron.
Since using 0.5mm solder I have NEVER had to remove excess solder from a
joint or the iron. That's why a spool of 0.5mm solder lasts much longer
than 1mm solder. 1mm solder is too thick!!
SOLDERING A SURFACE MOUNT COMPONENT
You will need tweezers to hold the component: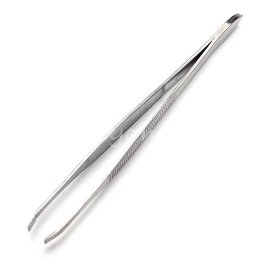
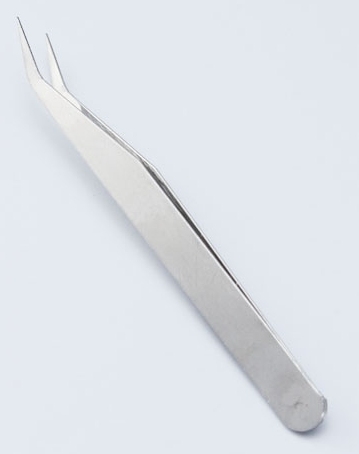
The tweezers can be straight or
bent.
Step 1:
Step 2:
Add a very small amount of solder to ONE pad: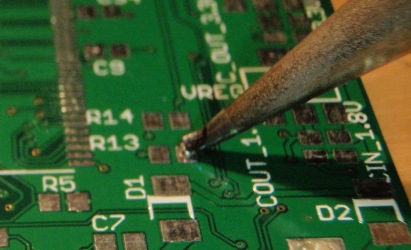
Pick up the component with tweezers with the value of the resistor
showing. (Do not solder the resistor up-side-down as you cannot see the
value!!!! BIG MISTAKE !)
Use the iron to melt the solder that is already on the land and this
will keep the resistor in place.
Make sure the resistor is flat against the PC board by lightly pressing
on it and slowly re-melting the solder if it is tilted or out of
alignment. You can also get the resistor to lay flat by momentarily
releasing the pressure of the tweezers and the resistor will "fall."
Make sure the resistor is square with the sides of the board and exactly
aligned on the lands.
Now solder the other pad. You can re-solder the first pad again and add
a small amount of solder to make a good connection.
Soldering the other land
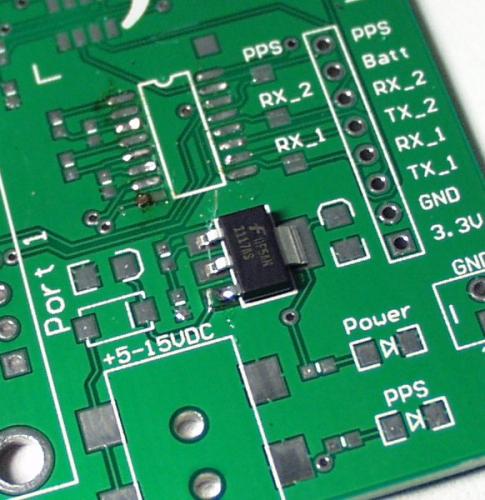
Soldering a Power Transistor
Place the transistor on the lands
and hold it in place with tweezers while re-heating the solder.
Solder all the "legs" ( pins) and "tab."
Re-solder the first leg to make sure it is fully soldered.
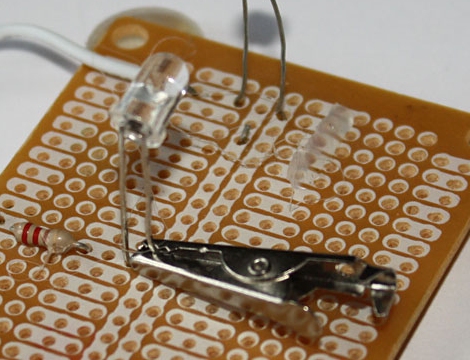
The photo shows a clip used as a heatsink to prevent
damaging the LED.
REMOVING SOLDER
Another method is to use a DESOLDER BULB.
These are expensive and the cheap ones don't work because the hole is
not large enough.
You can also use a
solder sucker. This costs
only $2.00 and works quite well.
CONCLUSION
Here is a Chisel point tip (Screwdriver tip)
It is too big for fine soldering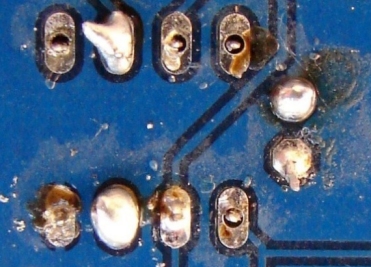
Here are some
messy joints.
If you follow our guidelines, you will not finish up with faulty
connections.
Fine solder is the secret. A temperature-controlled iron is
essential and cleaning the tip on a copper-wire ball will help to
produce good results.
This is not very good soldering.
If you use 0.5mm solder, the joints will improve 200%.
All the PC boards I produce have a solder-mask. This is layer
of green paint (printing) over the tracks so you
don't see the bare tracks (called traces).
Some very good connections and some poor connections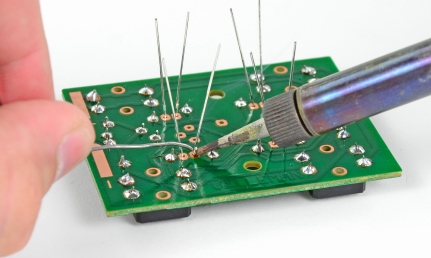
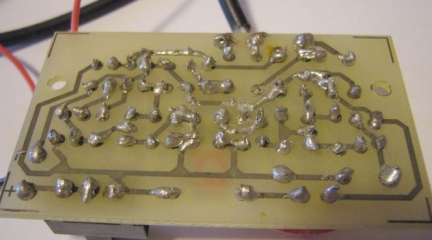
Here are some good soldering joints made with a cheap "hot"
soldering iron. You can see the barrel has got too hot.
You can make good joints with this type of iron if
you work quickly and keep the tip clean.
This diagram shows the wrong way to add solder
to a connection.
Never add solder to the iron. The flux just burns off and is wasted.
The third diagram shows how to add solder to the tag and
push the solder towards the iron to get it to melt.
I don't like "screwdriver" tips.
They are not for
delicate electronic work.
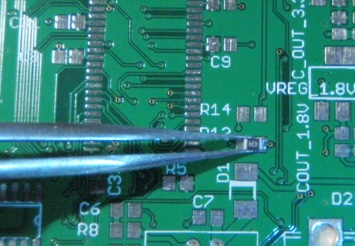
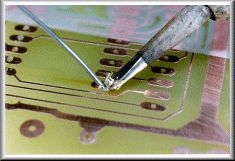
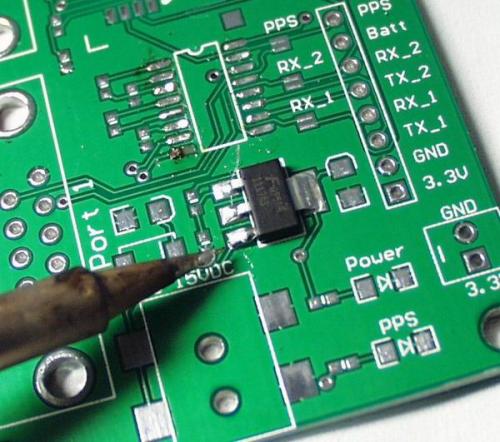
The image shows
the iron ready to place a SMALL amount of solder on one of the lands,
for the Power Transistor. Use a soldering iron with a "pointy tip"
(conical tip). A "screwdriver tip (chisel tip) is not ideal for fine
electronic work. Only a "point tip" will allow you to solder all types
of fine connections. 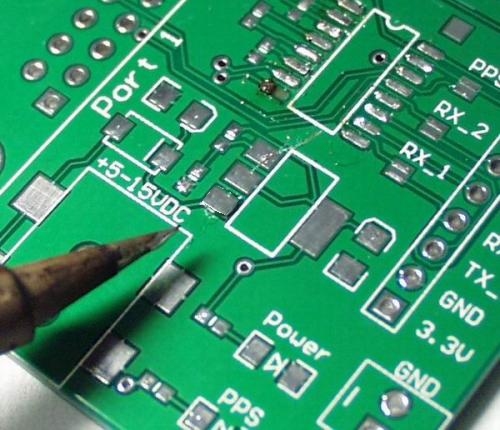
This will prevent the transistor moving.
Make sure it is touching the PC board.
See the excess solder on the iron. He has not used very fine 0.5mm
solder !!!!![]()
A very small amount of solder has already been placed
on the land and is re-heated very quickly to hold the transistor
in place. The other two legs can now be soldered.
If you follow this article and use a temperature-controlled soldering
iron and 0.5mm solder, you will not need to use a heatsink as the joint
will be soldered quickly.
If you every damage a transistor or LED, you are taking too long.
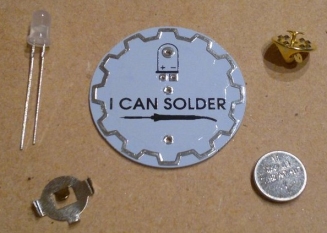
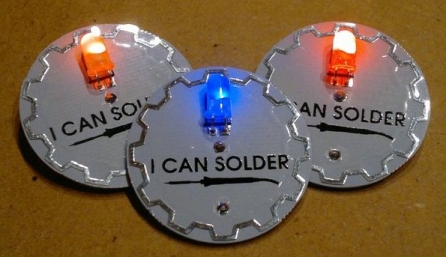
Here is a "I can Solder" badge kit from the web
for about $3.00 to $6.00
It uses a colour-changing LED and 3v lithium cell
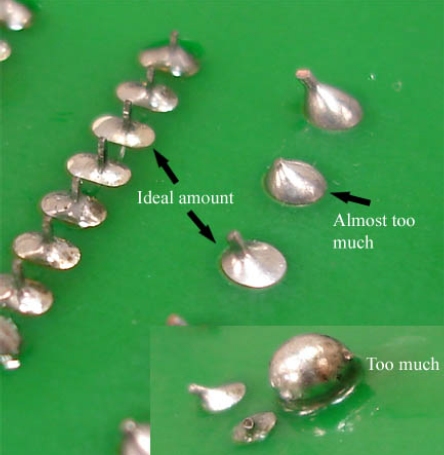
You should not produce blobs and shorts when soldering if you use the
method we have described above. It is virtually IMPOSSIBLE to leave too
much solder on a joint if you use 0.5mm solder.
However a blocked hole will prevent fitting a through-hole component and
the hole must be unblocked.
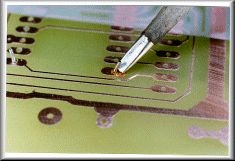
The quickest and easiest way is to heat the hole (the land around the hole is called
the doughnut or pad) with the tip of the iron inside the hole.
Immediately take the board away and tap it as strongly as possible on
the bench. The solder will fly out of the hole. This
is especially a problem if the hole is "plate-through."
If the hole is on a single-sided board, you can use DE-SOLDER WICK.
Sometimes you can remove the solder from a plate-through hole and remove
the component. It depends on the size of the hole and the thickness of
the wire. Sometimes you can get rid of most of the solder and pull the
lead when the iron is re-heating the joint.

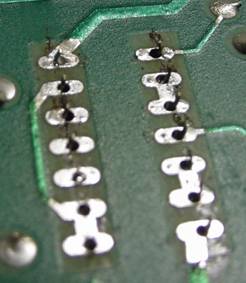
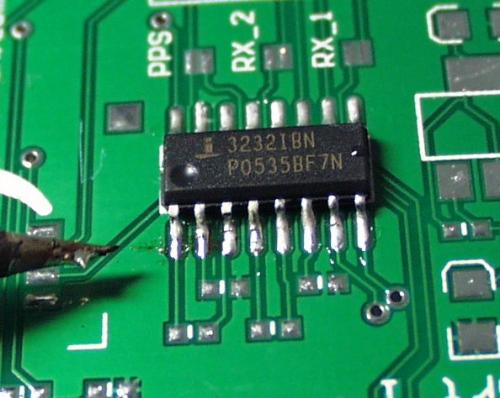
The solder was removed from
the 14 pins with solder wick.
You need to be careful and not overheat the lands as they can
easily lift off the board if overheated.
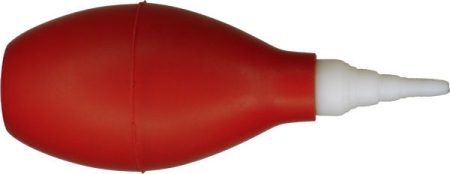
About $8.00 plus postage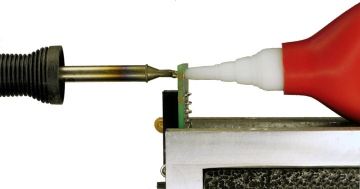
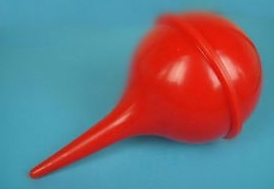
This bulb DOES NOT WORK. The hole is too small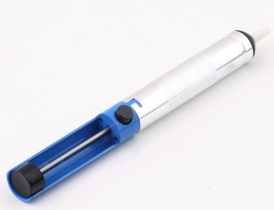
Here is another article on
soldering Surface Mount components and a list of identification codes
for surface-mount transistors and diodes.
Surface Mount
Using and
Soldering SURFACE MOUNT components is quicker, cleaner, easier
and more rewarding than soldering through-hole components.
As soon as you agree, you have mastered SURFACE MOUNT.
The art of desoldering is just as important as soldering.
There are many times when you will want to remove a component from a PC
board without causing any damage.
If you heat the component too much, pull it too hard or wiggle it too
much, the track will be damaged.
Removing a component from a double-sided board that has vias from one
side to the other is slightly more difficult as the hole remains filled
with solder.
You can also get a lot of valuable components from old PC boards: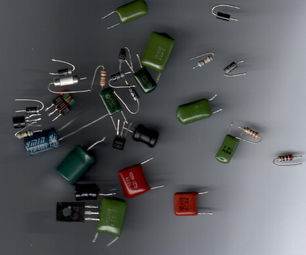
The fastest way to remove a component is to connect a hook and rubber
band and pull on the component while heating both leads at the same
time.
A loop of string is better as it wont sent the part flying off.
If you are very clever, you can pull on the component while holding the
board and heat the leads. This way you don't need any help from a hook
or string.
If you want to fit another component in the same holes, you will need to
remove the solder from the holes.
This is done by poking the tip of the iron into the hole and making sure
the solder has melted. Now, IMMEDIATELY tap the board on a hard surface
and the solder will fly out of the hole.
Any remaining solder can be poked with a pin as the pin will not attract
the solder.
Multi-leaded components such as IC's and sockets need expensive
solder-pots or hot air guns as you cannot get to all the pins quick
enough.
Another way to clean a hole is to use a needle. Heat the pad and push
the needle though the hole. Some needles do not accept solder and can be
removed quite easily.
And finally another very good method is to use a length of enamelled
wire. Heat the pad and push the wire through the hole. The enamel will
not melt and the wire can be easily removed.
Practice on JUNK boards before working on something you cannot afford to
damage and you will be ready for SOLDERING and
DESOLDERING.
Colin Mitchell
11/10/2022