HOUSING YOUR
PROJECT
|
Making
"HOME
- BREW" Cabinets |
No matter if you
call it a Box,
Case,
Housing
or Cabinet,
enclosing a project is one of
the most expensive and difficult things to do.
I have had a "boxing" dilemma for years because I consider most of the cases and
enclosures are far too expensive for the job they perform.
I operated a moulding machine for many years and produced small cases. At a
production cycle of nearly 1 minute, the manufacturer was making $3.00 boxes at
$180 per hour. These boxes sold in the hobby shops for $10.00 - $12.00
The material content was less than 70¢ plus the cost of my labour, the die and
machine-time made the job a very profitable venture indeed.
Maybe because of this knowledge, I have always considered a case designed for
electronics projects to be an over-priced item.
I have to admit, some of the suppliers have reduced their prices considerably
in recent times, and the range of cases has improved,
but there is still a lot of searching to be done to find that elusive
case.
Trying to get something that looks appropriate for the job and yet doesn't cost
more than the contents it houses, is still a problem.
In this article I will be providing some links to suppliers of plastic
enclosures and show you how you can save a fortune by buying from the
manufacturer. And you can try our two other methods of enclosing! But firstly I
want to go over some of my background thoughts.
TO HOUSE OR
NOT TO HOUSE
Basically I have two minds.
Sometimes I would like to house a project to make it look neat and appealing
and other times I want to leave it bare.
There is a very good reason for not wanting to house a project.
If it is left as a "skeleton PC board", you are constantly reminded
of how the project is constructed and this constantly reinforces your mind of its
design.
If you house it,
the construction of the board gradually fades from memory.
Electronics is all
about remembering.
The more you are kept in touch with reality, the better you become at
recall.
And recall can be fantastic.
One of our circuit designers (Bob) came in to the office one morning and
suggested he design a 6 transistor Hi Fi amplifier. He had been working
on a prototype at home and felt it was ideal for our magazine.
"What's the circuit like?" I said.
Without hesitation, he drew the circuit from memory.
That's what I call dedication.
These capabilities stem from constantly "eating and drinking electronics" and
having a project in its "open form" allows you to recall how it is
put together.
On the other hand, some projects need to be housed to make them
"useful". Items such as hand-held test equipment, Logic Probes,
Wiring Tracers, Megger Meters, need to be housed to prevent damage to the
components. And power supplies need to be housed to protect the user from mains
voltages. There are always exceptions.
Each project needs its own decision and if you come up with the need for a
housing, you have three choices:
1. Purchase
a ready-made plastic box,
2. Make your own housing,
3. "Adapt-A-Box".
There are many reasons for sitting down and considering the choice. The main
one being cost.
You have to work out how much you can economically apportion to the housing of
a project.
In the past, some of the best solutions have come from readers.
Two that come to mind were for our FM transmitter and Logic Probe. Two
readers suggested using a toothbrush case to house the Logic Probe. One of the
cases was clear polystyrene. This is a hard plastic and is very brittle. The
case looks very professional when new and you can see the works through the
plastic. This solves both my suggestion for keeping the works visible and
housing the project for "usability". The other suggestion was to use
a "blow moulded" case. This is a soft material and is much
more durable. It is also clear and both cases can be closed with tape to keep
them from opening.
The best part is the cost. For less than $3.00 you get a FREE toothbrush and an
ideal case for a project.
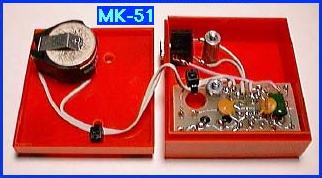
The other amazing solution from a reader was to use a Tic Tac box to house one
of our FM transmitters. These "Mints" come in clear or coloured boxes
and for less than $1.00
you have an ideal enclosure.
We purchased Tic Tac's by the "outer" (144 boxes) and the sales
personnel must have through we had really bad breath. Why's an electronics organization
buying Breath Mints? We sprayed the boxes matt black and sold
the "Bugs" by the hundreds.
Now that I have been alerted to the suitability of using boxes from these types
of sources, I have
found a lot more that can be converted to housing a project. Quite often I
look around a shop with this object in mind.
Some of the most unusual boxes come from a chocolate shop. Offering chocolates
to your friends is a quick way to empty the box and you are left with a delicate but
roomy enclosure for all sorts of uses.
Some of the shapes are really interesting. A Pyramid of chocolates converts to
a LED puzzle (to be presented in a future issue) and a "Christmas Ball
Decoration" converts to another electronic puzzle.
You have to be inventive and if a box is really fantastic in appearance, it enhances
your project considerably.
The thing I can't understand is this: Some beautifully-presented plastic boxes can
be filled with a product such as chocolates, and yet the same type of box costs twice as
much when EMPTY!
To this end I have tried to search-out some of the suppliers of boxes and
cases, so you can house your projects and the results are below.
The other alternative is to make your own.
I have had considerable experience fabricating enclosures for projects I
designed for large companies.
Most of them had to suit the PC board and it was necessary to
make the box from 1/8" (3mm) perspex. After cutting and linishing
(smoothing) the edges of each piece, they were glued (welded) together with a
solvent. The best solvent for this is ethylene dichloride (smells like bananas)
or acetone (nail polish solvent - do NOT inhale!) Simply place two pieces of
the box together and allow the solvent to run along the crack. It will dissolve
the plastic almost immediately and keep them together. Repeat the process at a
later date to strengthen the joint.
This is the best and cheapest way as no "glue-residue" is produced.
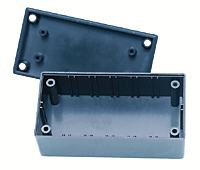
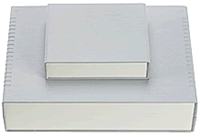
The only problem with making your own case is the quality of the edges and
corners. One solution
is to keep the sides slightly recessed and this produces a box very similar to an
"instrument case". You can almost duplicate the appearance of an
instrument case for less than 25% of the cost. A typical home-made
enclosure is shown below:
 |
|
|
Making your own enclosure |
One of the difficulties is screwing the two halves together. You can solve this by
making the two halves click together (not shown). This is one thing a
manufacturer
cannot do. He cannot make a finger of plastic extend past the die-line as it will break off when the moulding is ejected from the die.
Only very small "returns" or "projections" can be made and if a large
projection is needed, the die
has to be "openable". This adds considerably to the cost of the
die.
You can design the two halves of the box so they click together and they can be separated by
pressing the lower sides inwards. This gives you "secret
access" and allows the full area to be used.
There is nothing worse than pillars inside a case. They reduce the board-size
considerably and quite-often make a case very inefficient.
MAKING
"HOME-BREW" CASES
An excellent article by William B. Jones, KD7S, Sanger,
California on producing your own "hardwareless" cabinets
can be found by clicking HERE.
THE IDEAL
CASE
I am still waiting for the ideal case. I have a moulding company ready to
produce a perfect design and I am sure I will get it out for less than a few
dollars. The only problem is the size and shape.
Sometimes you need a recessed front panel or a
rectangular cut-out for an LCD display. A 9v battery compartment is quite often
needed and yet it has such a short life. A better choice is AA cells. A sloping front panel allows displays
and controls to be viewable and feet give the case a top-side. All these things
have to be weighed-up and eventually I will come up with a design.
Now we come to the enjoyable part.
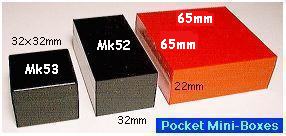
I have found a number of project boxes and have provided
thumbnails to show how they look. One of the cheapest designs is
produced by
ElectronicsUSA.com
but the range is only three sizes and the largest box is 2in x 2in x 0.7in.
I don't know how many projects can be fitted in a box this size, however the site is well laid out
and it shows a project in the large box.
Here are the three sizes.
The 2in x 2in x 0.7in box (65mm x 65mm x 22mm) costs $1.50 each:
 view
range and prices
view
range and prices
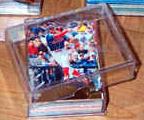
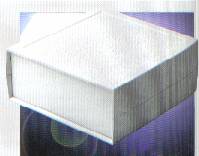
Here is a project fitted into the "large" box:
If the box is designed for another purpose (such as for holding playing
cards) the cost is considerably less. If the same size is a dedicated electronics box, the price
rises to $5.40: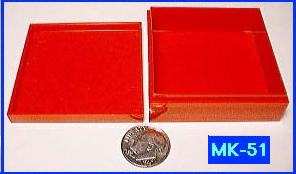
The plastic box below costs about .89¢ and holds about 100 cards. The 250 card
box costs $1.99
 view
range and prices
view
range and prices
 view
range only
view
range only
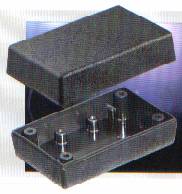
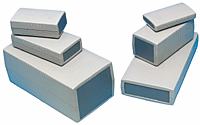
There are also a range of "hobby" boxes . . .
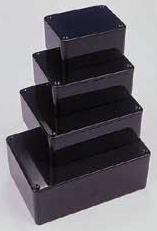
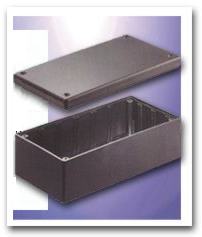
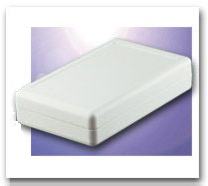
. . . and a number of "professional" or "instrument cases:"
CONCLUSION
The final decision is yours.
You have to look around to see what is available as the price for a good design can be half that of a poor design. I think it mainly reflects the
country of origin. Overseas products are considerably cheaper and the quality
is improving. You have to actually see the product to appreciate the
differences. Sometimes the lids don't fit perfectly or they are made from re-cycled (mixed)
plastic. You cannot detect the difference until you drill it. The re-cycled
plastic clogs up the drill and the holes "burr-up". The re-cycled plastic
"laminates" (falls apart in "sheets"). Another problem is
the quality of the plastic. Some plastics have a
very low melting point and the box will distort in the sun.
These are all problems we have experienced with different manufacturers
and it only becomes a problem when you order large quantities and the defects
start to appear. These
things have been addressed with our suppliers and it's now smooth sailing.
Many of the projects we will be presenting in this e-magazine will be an
"open" or "skeleton" design and not require a case. The PC
boards are very well laid out and are a pleasure to display. We mainly like the
caseless design to keep cost down, however if you want to house any of the
projects, the choice is yours.
Don't let me put you off. I sit on the fence in this matter. If you have a
particular reason for your decision, I can be persuaded either way.
I like to put the effort into the electronics side and leave the hardware to a minimum. That's why it sometimes takes a group of people to finalise a project.
It's great if you have capabilities in both areas.