P5
When you have finished the experiments, go
to "21" a
strategy game.
Whistle-On Whistle-Off
This experiment turns on a LED when a whistle is detected. The LED turns off when the whistle is detected for the second time.
|
||||||
EXPERIMENT 12
Light
Detection
This experiment
detects the presence of light. A photo-darlington transistor is connected to
the circuit via a plug and socket and exposed to light.
The change in resistance of the photo-darlington transistor creates a voltage change across it and
this is amplified by the circuit and delivered to an input of the
microcontroller. The program turns on the 8 LEDs when the photo-darlington transistor
detects change in illumination.
The photo-darlington transistor is connected to the circuit via a capacitor
and only CHANGES in illumination are detected.
If the illumination is decreased, a point will be obtained where the circuit
is sensitive to the changes in supply rail voltage. At this point the circuit
will start to oscillate or MOTOR-BOAT.
The circuit must be re-designed to prevent this from occurring.
If the photo-darlington transistor is placed in a room with incandescent
lighting, the 50 or 60Hz from the light will be detected. These pulses must be dealt with by the program
to obtain a reliable HIGH/LOW pulse.
|
||||||
GOING FURTHER
Once you complete the experiments in this project, you will want to write
your own programs.
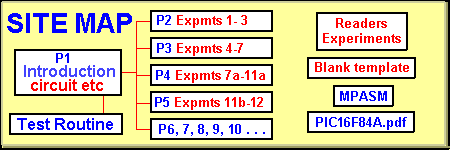
The website includes a PIC template called "Blank_84.asm" This is a
blank template with the set-up code and headings, in place.
The template can be found by clicking "Blank_84.asm"
for the file. Put it into a text
program such as TEXTPAD, WORDPAD or EditPad. EditPad is on the site for
downloading and is by far the best text program.
Copy "Blank_84.asm" and give it another name so the original is available
again.
Simply delete any code that is not needed and add your code to the
sub-routines provided on the template.
It is best to use the pre-formatted template as it is important not to have any hidden
formatting code to upset the assembler when it is being assembled.
If a program fails to assemble, re-type the faulty lines onto the
template and re-assemble, as it may have picked up some hidden tabulating code
or imaginary spaces. This is something that took us hours to locate. The
assembler was looking for a label with an extra three spaces!
The "Burn" program for the Multi-Chip Programmer is included on the
website as a .zip file and full instructions are given for setting up the
Multi-Chip Programmer.
PIC LAB-1 FOR SCIENCE QUEST
The experiments in this article represent the starting-point
in each group.
It's possible to expand any of the applications to incorporate monitoring or
recording an event or combining two or more to create a completely new
operation.
On the website we have added a page for Reader
Experiments. You are
invited to send in your ideas and programs and we will add them so you
can share your ideas with with others.
PIC LAB-1 is ideal as the foundation for a Science Quest project.
The applications are almost limitless and the design of the PC board makes
them very easy to implement. The secret is the microcontroller. It removes the need for
lots of individual chips for counting, timing, displaying etc and reduces the
complexity of a circuit.
If you intend entering a project for a quest, it is essential to prove the
concept has been developed by yourself. The only way to do this is to keep your notes and prototypes and hand
them in with the final design.
You can detect pulses
from a switch, magnet, light-source, as well as audio frequencies, temperature
(via a diode), degrees of rotation of a potentiometer, resistance, voltage,
magnetism (hall effect device or coil) and others. The output can be on the 7-segment
display or something you have added.
But the most impressive part of your project will be to do something new.
It may be to detect a scent, bacteria growth, onset of a fainting spell or epileptic
fit, water purifying through a natural reed-bed, removing odours from a car in
heavy traffic, guiding a wheelchair in a straight line, preventing super-market
shopping carts being stolen, preventing cars colliding in the fog, guiding
survivors through a smoke-filled building, making a sucking/blowing device for
bed-ridden patients to operate equipment, TV's etc. or one of a million applications
needing processing power. There are thousands of simple requirements for
invalid people, and this is where recognition will be highlighted.
You only need to design to the stage of preliminary findings. This will make
your entry unique and you can take on further development at a later
date.
It is the concept that will win you an award and PIC LAB-1
can help with many of these ideas.
WRITING A PROGRAM
To write a program for
the PIC16F84 microcontroller, or modify any of the programs we have
written, you will need the instruction-set. This
consists of about 35 "English-like" instructions, that are able to be read by
you as well as a program that will convert them into machine-code
numbers for the microcontroller.
These "English-like" instructions are called mnemonics and the
Instruction-Set for the PIC16F84 is available by clicking: F84INSTRUCTION-SET.
Definitions for each instruction plus articles on PIC Programming are available
in the "PIC PROGRAMMING COURSE." This is on the POPTRONICS Interactive Edition
website. Easy
subscribing details are provided on a link.
Go to the menu of your computer and create a new folder called Experiments.
Place it inside your PIC LAB-1 folder.
You will need blank
template
on which you will be able to write your own programs.
Download the blank template zip file into Experiments folder. Extract it to produce
BlankF84.asm
Open a text editor program such as TEXTPAD or NOTEPAD and open the file BlankF84.asm
Rename it to Expt-1.asm or the name of your new project.
Edit the code on the template and add your own code to perform a simple
operation that takes an input signal from a switch and outputs the result to a
LED (copy some of the code from an experiment and add a few lines of your
own).
Save the file. Make sure it is saved as .asm as the text editor will
naturally save it as a .txt file.
Go to the Site Map above and click on
MPASM
Move MPASM.exe to your desktop folder.
It will appear on your front screen.
Click on the Icon on your desktop and MPASM v02.70 will appear. Make sure the Radix is Hexadecimal, Warning Level: All
Messages, Hex Output: INHX8M, Generated Files: List File, Case Sensitive: NOT
Ticked, Macro Expansion: Default, Processor: 16F84, Tab Size: 8, Save Settings
on Exit: TICKED.
Press Browse to locate Expt-1.asm file. The file name will appear in
the top address box. Press Assemble it to
get a small dialog box with NO error and no warnings. This will produce a .cod .hex and
.lst in
the same directory as .asm
If you get an error, the .hex file will not be generated, so go to your Text
Editor and load the .lst file.
Read the .lst file and it will explain where the fault is located.
Go to the .asm file and make the correction(s).
Re-assemble the file again.
Here's a tip: To make sure you are actually assembling the corrected version,
I suggest you save the file as: Expt-1a.asm
When the file assembles correctly and a green background appears on the dialog
box after assembly, you will have a .hex file in the same directory.
You now need a program to take the .hex file and burn it into the chip using
the Multi Chip Programmer.
The software program is: ICPROG.
See
IC-Prog.exe and a help file:
ICPROG-Help
(IC-Prog.chm).
Place ICPROG.exe into your desktop folder and it will appear on your
screen.
Go you your front-screen (desktop) and open a text editor program such as
TEXTPAD or NOTEPAD. Open the file to be burnt, such as:
Expt-1.hex
Open ICPROG.
On the small window showing the types of chips the programmer is able to program,
select PIC 16F84.
In the oscillator window, select RC.
In the fuses windows, remove all the ticks.
Click on the "open file" icon on the left hand side of the screen.
Find Expt1.hex and load it into the programmer. A tick will appear in the WDT
window to indicate a file has been loaded. Remove the tick.
Make sure Multi Chip Programmer has been fitted to "Com1" via
a serial cable and the red LED on the Multi Chip Programmer is active.
Click on the IC Icon with the "lightening" and a dialog box with
"Do you really want the program the device?" will appear.
Click
"yes" and the orange and green LEDs will illuminate on the Multi
Chip Programmer and the screen will indicate the
chip has been programmed correctly.
Remove the chip and fit it to the PIC LAB-1 project. Fit any necessary
input devices and switch the project ON. The LEDs on the output will respond.
If every thing has gone successfully, you will have "burnt" your
first program.
Only some of the steps above will have to be repeated, but this is how the
program comes along.
Add only a few lines at a time so that fault-finding will be limited to a
small part of the program.
Once you get the basics working you can add add sub-routines for counting,
displaying, etc and gradually build up the project to impressive dimensions.
You will find many of your requirements can be met with the
components on the PIC LAB-1 and by simply adding a sub-board, a more-advanced
project can be created.
When you get the design working, you can CAD the artwork for the board. Don't
forget to include a top layer or legend. This is absolutely essential if you want to produce a quality
item - but is not essential for a Science Project.
All the programs needed to create a Printed Circuit Board are available on the
web.
CREATING A PROJECT
To create a project you need to follow a few simple steps.
But before you start, there is one factor you must remember. Everything
you do must consist of small increments and it is essential to start at the
beginning with something very simple. This is the only way to create a
program.
As each stage of a program works correctly, it can be saved with its own
reference number so that you can go back to it if a problem develops further down
the track.
But writing a program is not the first step.
A circuit needs to be developed.
You should look through books and magazines to see how it has been done using
discrete technology.
Collect as much information as possible to help you with your design and see
the complexity of the circuit.
Projects requiring 3 or more chips will be in the "economics zone"
as well as those requiring more features than already available.
The aim will be to use as many of the "building blocks" on the PIC LAB-1
as possible. They can be modified and extended to suit your
application.
The circuit is initially laid out as BLOCKS
showing the input, the micro and output sections. Pin numbers and component
values do not have to be worked out until
later.
Start with a simple part of the circuit such as turning on a LED when a
switch, is pressed.
Write a program to make sure the micro is detecting the input
device and outputting the result on the LED.
Pick out any of the experiments we have designed for the PIC LAB-1 and see how
we have written the instructions. Add instructions of your
own.
Make sure this part is working before adding another section.
Gradually build up the operation of the project by adding a small section at a
time. It's a slow process but it's sure.
Quite often you can borrow previous routines to speed up the process and
eventually the project is complete.
CONCLUSION
This is not the end. It's just the beginning. Your rewards are just about to start.
There are so many things you can do.
We have covered many ideas in this project and it's just a matter of looking
into something that "sparks an interest" and running with it.
Everything you need is on the site and we have produced more pages to show how to
go further with more advanced programming.
The next Pages . . .
The next pages explain the theory behind some of the input/output devices and how to connect them
to a microcontroller.
We also have many more experiments involving more-complex programming with two
or more elements.
Also included is a complete LIBRARY OF ROUTINES for the PIC LAB-1, arranged in
alphabetical order.
Each time you need a step in the development of a program, go to
the library for suggested instructions. This will help you build a program
very quickly and up to 80% to 90% of most programs can be created this way.
The next page has a strategy project called
"21". It is the old 21 matches game where you take 1, 2, or 3
matches, leaving your opponent with the last match. It shows programming to a
tee. Especially the "strategy" section, where all the
"thinking" takes place.
This is possibly the most complex type of project to be covered, using a PIC16F84 chip
but the straight-forward layout will help you work through each of the
sections.