|
Point Controller |
|
|
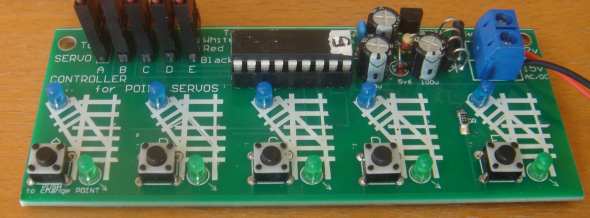
| This projects converts up to 5 points into remotely-controlled points using servos that has been slowed-down to produce a realistic effect. The micro does all the work. |
With this project you can convert up to 5 points with
slow-acting servos and they can be mounted on the top of your
layout or underneath.
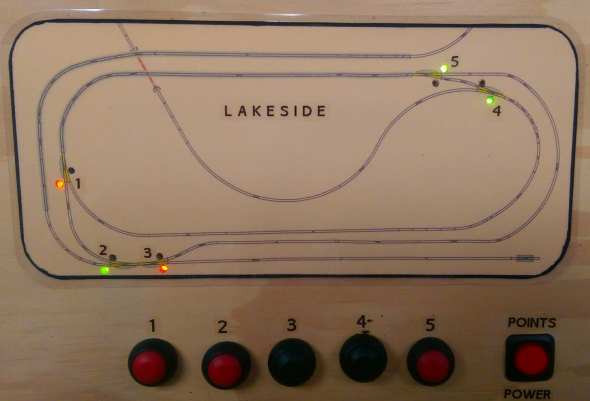
When a push button is pressed, the corresponding red LED
illuminates to show the point is being changed.
This is called "synchronising the module to the points."
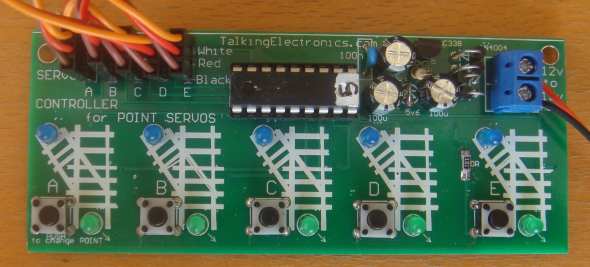
The module uses a PIC16F628 microcontroller to do all the work.
Switches 2, 3, 4 and 5 (on the module) are connected (the tracks on the PC board) "on the diagonal" so be careful when extending the leads when the switches have been removed.
You can extend the leads to the switches without removing the tactile switches and this will prevent any problems.

You can mount the servo beside the track with double-sided tape or in an aluminium housing.
MOUNTING
THE SERVO "on the top"
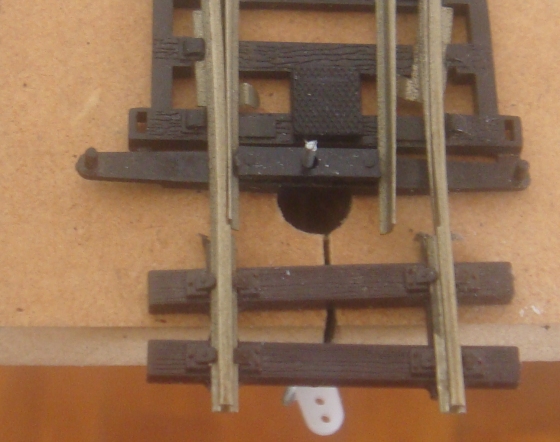
The two photos above show how to connect the servo to
the lever of the point. No bracket is available as the
servo can be positioned with double-sided tape and then
glued in position when the action has been adjusted.
You need to connect the servo to the point with a stiff length
of wire called a LINKAGE. (also called a PUSH-ROD)
The servo and the linear actuator produce LINEAR MOTION and the
project reduces this linear motion to a very short distance to
suit the "THROW" of the point. This is done by reducing the
rotation movement of the servo via the program in the micro or
the travel of the linear actuator.
This is the distance the point must be moved to change the
rail(s) from one position to the other.
The servo produces this motion (distance) via an arm connected
to the output shaft and it has a number of holes to so you can
get the appropriate "throw."
Connection between the point and the servo is done with a short
length of copper or steel wire and this can be called a PUSH
ROD, PULL ROD or LINKAGE.
It needs to be straight. It can be bent at the ends so it
remains in position.
You need to work out where to position the servo or actuator and
then it can be housed in a signal-man's hut as shown in the
photos.
ooooooooooooooooooooo0000000000000000000ooooooooooooooo
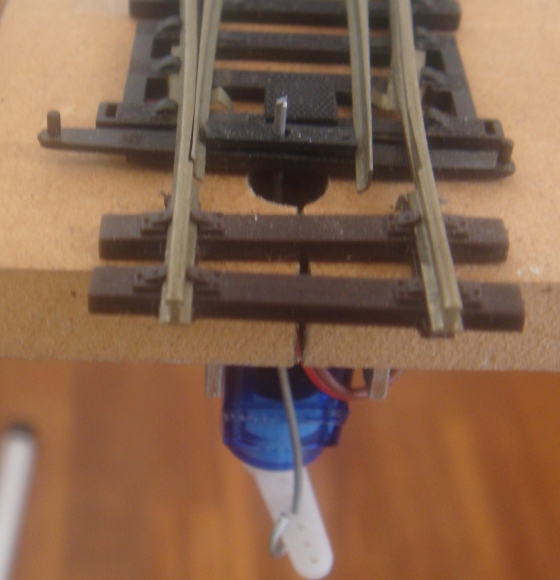
UNDER-LAYOUT MOUNTING
You can mount the
servos under your layout, as shown in the following
photos, using a bracket supplied by Talking Electronics.
It comes with two machine screws to hold the servo in
place and two wood screws to hold the bracket under your
layout. You only need to drill a hole in the base-board
of your layout to allow the control rod to activate the
point.
 |
The Travel or “throw” of the arm must be
adjusted so that the servo naturally stops at the end of
its travel and the motor must stop working. It there is too much tension in the rod (also called lever), the motor will keep working or “hunting “ and this will overheat the regulator transistor on the module. You can feel the BC338 regulator transistor at any time and if it is hot, there is a “hunting” fault. Use different holes in the arm to get the right amount of travel. |
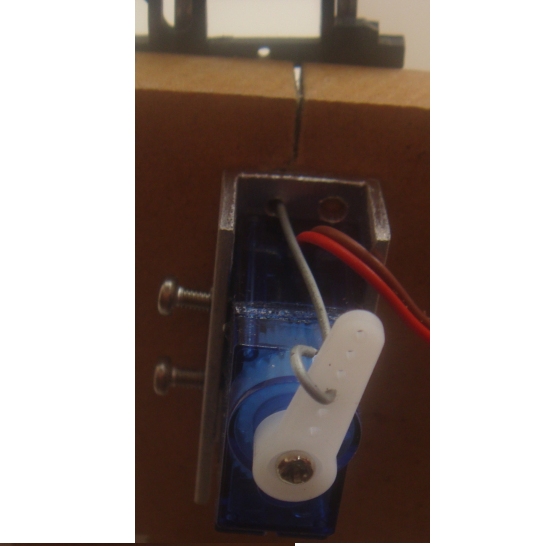

The "push rod" pivots via a 1mm hole in the base of the bracket and the movement of the arm produces a sideways movement via the push rod to the point. The rotation of the servo has been limited to 70° to do this. We are converting a rotary motion of the output of the servo into a forward and reverse motion that is effectively a linear motion.
MORE NOTES:
This projects uses servos that have been slowed down and only rotate about 70 degrees so you can use them to change the position of a point.
The module (containing the electronics) costs $25.00 (built and tested) and you can get special slow- motion servos with 70 degree activation for $2.50 each.
The servos can be mounted on the layout or underneath and each point will cost less than $10.00 when all the parts are included.
This is the cheapest point controller on the market with a press-button to change the point and 2 LEDs to show the position of the point.
You can also get a bracket to hold the servo for under-board mounting for $2.50 extra and 2 metre extension leads for $1.50 extra. You need to order everything together, at the same time, to get the $6.50 postage. Contact Colin Mitchell for more details
18/10/2019