|
Metal Detector |
This project is an extension of
Metal Detector MkII,
with a small detecting head to find tiny components such as nails and
lost components.
Kits for
Metal Detector kit - Nail Finder $17.00
plus postage
See the following site for lots
of projects on metal detectors:
Geotech
See also our:
Metal Detector Article
This is an essential tool for servicemen and anyone trying to find a
metal object hidden or buried in timber, soil or mud.
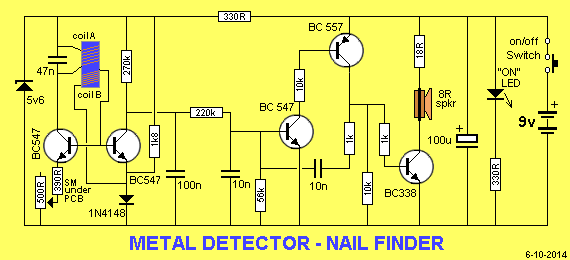
It uses the Metal Detector MkII PCB and components but a new "head" is
used that is wound on a 10mm ferrite rod. This head comes completely
wound and ready for soldering to the PC board.
CONSTRUCTION
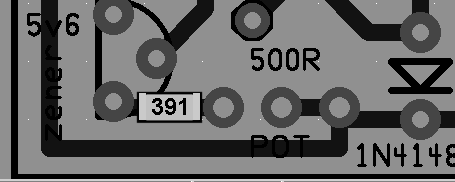
Under the board, in the
location shown above, you will find a
390R SURFACE MOUNT resistor, soldered to the tracks.
When soldering the pot and transistor, only solder
one leg at a time so the surface mount resistor
does not move. This resistor adjusts for the type
of wire and coil-size.
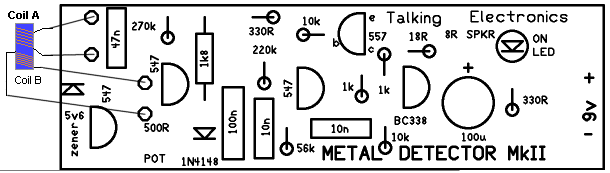
When fitting the components on
the Printed Circuit Board, use the overlay above to help locate the
correct holes.
When fitting the positive lead of the 9v battery snap, make sure you put
it through the large hole and solder it to the end of the switch as well
as the adjacent land.
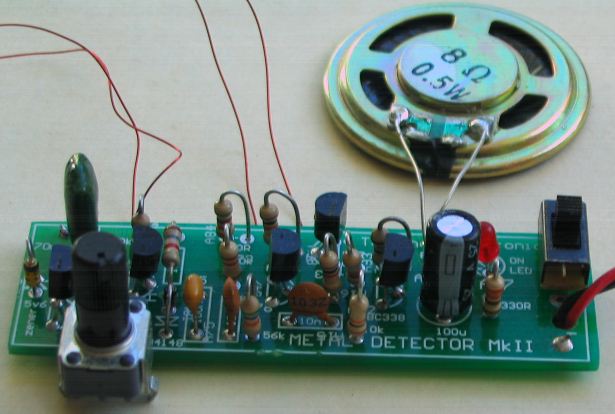
All the components fit on the PC board with the
coils and speaker on short leads
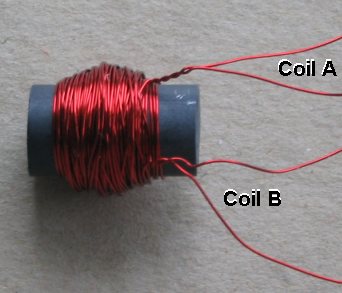
The Nail Finder head
SETTING-UP
Solder the wires from coil A and B to the board and turn the project ON.
If the squeal does not stop when the pot is rotated, swap the two wires
on coil A.
Adjust the pot until you get a very low-frequency clicking noise.
This is the most sensitivity setting.
Metal
Detector Nail Finder |
|
1 - 18R resistor
all 0.25 watt |